Revit architecture roof design plays a major role in modern residential projects because the roof is more than just a cover for the house. It shapes the home’s style, helps control water flow, supports energy performance, and affects how the building feels inside and out.
When you design a roof in Revit, you are not only drawing a shape. You are building a real digital version of a roof that you can adjust, test, and show in plans, sections, and 3D views. This makes the design process easier, faster, and much more accurate.
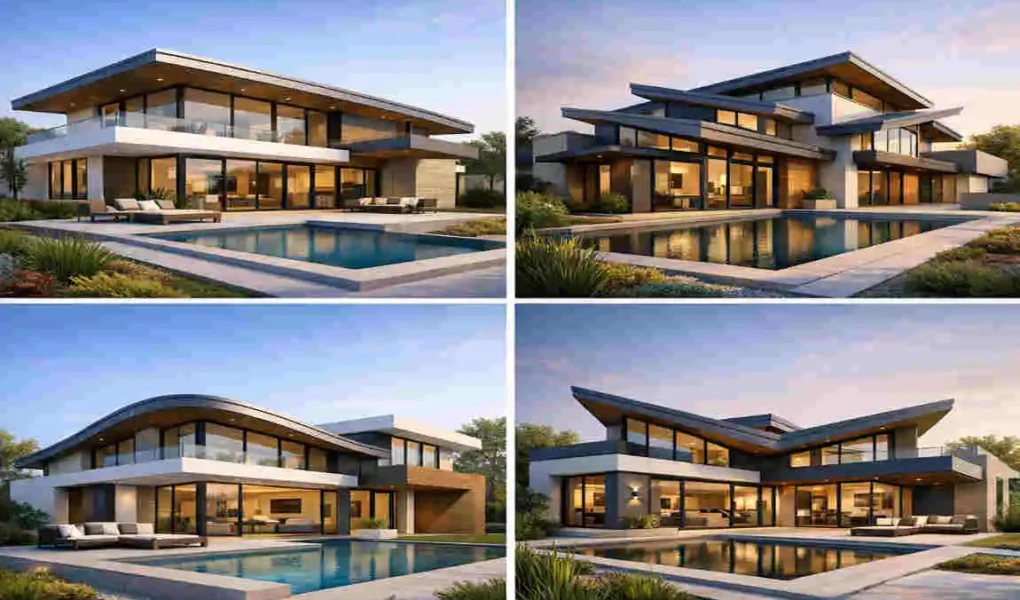
Modern homes often use simple forms, clean lines, and strong visual balance. A roof can support that style in many ways. It can look flat and minimal, slope sharply for a bold effect, or combine several shapes for a more creative layout. Revit helps you explore all of these ideas without starting over each time.
Understanding Revit Architecture Roof Design
What is Revit architecture roof design?
Revit architecture roof design is the process of creating roof forms inside Autodesk Revit using building information modelling tools. Instead of drawing only flat lines, you create a smart roof object that understands slope, thickness, edges, openings, and building levels.
This is useful because a roof in Revit is more than a shape. It connects with the rest of the model. If you change the wall height, roof level, or slope, the roof updates automatically. That is one of the biggest strengths of parametric design.
For modern homes, this matters even more. Many contemporary houses use unusual roof angles, large overhangs, or mixed roof forms. Revit helps you test these ideas in a controlled way.
How roof tools work in Autodesk Revit
Revit gives you several ways to create roofs. The most common methods are:
- Roof by footprint
- Roof by extrusion
- Roof by face
- Roof by slope arrow and reference planes
Each method serves a different purpose. Some are best for simple homes. Others work better for complex, expressive forms.
A roof by footprint is often the easiest choice. You sketch the roof outline, set slope lines where needed, and Revit builds the roof from that boundary.
A roof by extrusion is helpful when the roof shape needs to stretch along a path. This works well for unusual modern forms or when the roof profile repeats along one direction.
Creating roofs from footprints
This is the most common method for residential work. You trace the roof boundary over the floor plan or reference planes, then assign slopes to selected edges.
This method is popular because it is clear, fast, and easy to revise. If you adjust the building size later, you can usually update the roof without rebuilding the whole model.
For simple homes, this method is often enough. It works well for gable, hip, shed, and flat roof designs.
Creating roofs by extrusion
A roof by extrusion is useful when a simple outline doesn’t control the roof shape. Instead, you define a roof profile and then extend it across a line.
This is great for contemporary designs with strong geometric intent. For example, if you want a long sloped roof that cuts across the house dramatically, extrusion can help.
It is also a good choice when the roof needs a unique section shape that closely follows the design concept.
Using slopes, reference planes, and roof edges
Slopes are one of the most important parts of roof modelling. In Revit, you can set different edges to slope or remain flat. This gives you control over water drainage and visual form.
Reference planes help you lock the roof to a precise design idea. They are useful when you want symmetry, alignment, or exact spacing. In modern residential projects, this is especially helpful for clean roof edges and balanced shapes.
Roof edges also matter because they define overhangs, eaves, and the connection to walls. A small shift in the roof edge can change the whole look of the house.
How parametric modelling makes roof revisions easier
One of Revit’s biggest benefits is parametric modelling. This means your roof connects to other model elements and responds to changes.
If the architect changes the wall height, the roof may update. If you need to increase the slope for drainage or style, you can modify it instead of redrawing everything.
This saves time and reduces mistakes. It also helps teams work together more smoothly because the roof stays tied to the rest of the project.
Key Revit features for residential roof planning
Some Revit features are especially helpful for roof planning in modern homes:
- Level-based modelling for accurate roof heights
- Reference planes for alignment and control
- 3D views for visual checks
- Sections and elevations for construction review
- Material assignments for realistic appearance
- Roof openings for skylights and penetrations
These tools make it easier to turn a simple idea into a workable roof design.
Modern Roof Types You Can Create in Revit
Modern homes use many roof styles, and Revit can support most of them. Choose a roof type that matches the home’s shape, climate, and design style.
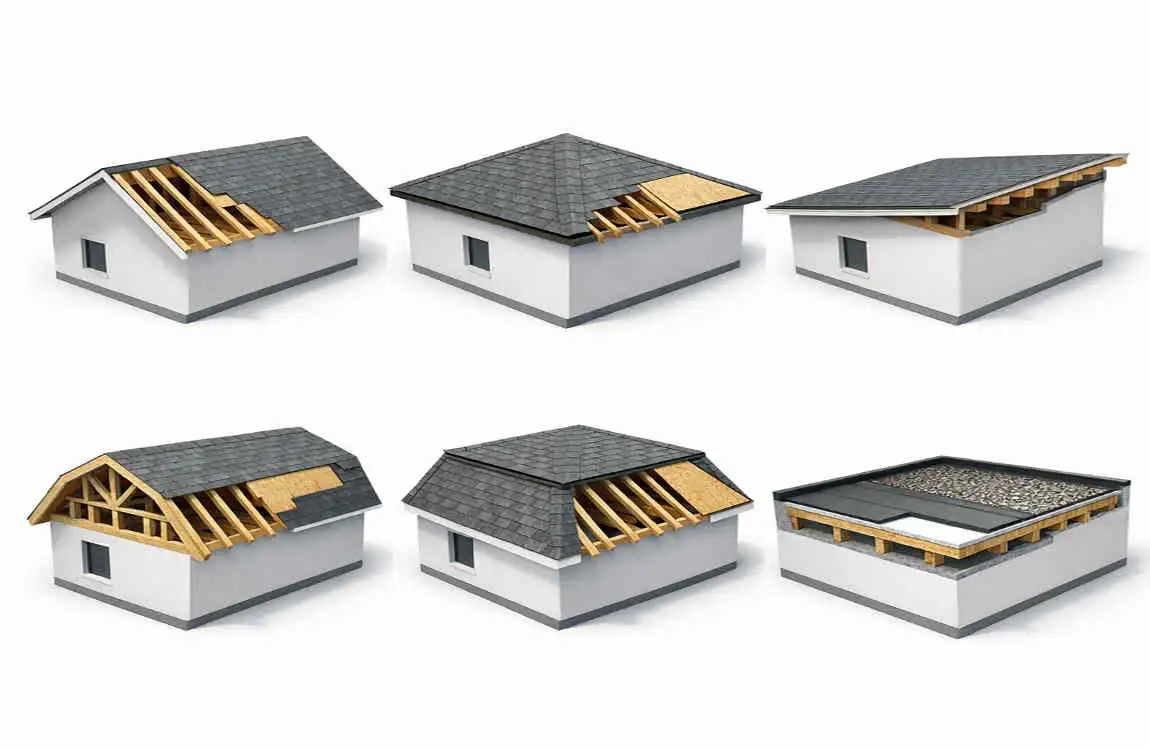
Flat roof designs
Flat roofs are common in modern architecture because they create a clean and simple look. They also support roof terraces, solar panels, and concealed drainage systems.
In Revit, flat roofs are usually easy to model. Even when they look flat, they often need a slight slope for drainage. That small detail is important for both design and performance.
Gable roof designs
A gable roof has two sloping sides that meet at a ridge. This is one of the most familiar roof forms, but it can still look modern when used with clean edges and simple materials.
Revit handles gable roofs well through footprint modelling. You can define slope on two opposite sides and keep the others vertical.
Hip roof designs
A hip roof slopes on all sides, which makes it feel more compact and balanced. It is often used in homes that need strong weather protection and a softer roof profile.
In Revit, you can easily create hip roofs with footprint tools. They work well for homes that mix traditional structure with modern details.
Shed and mono-pitch roofs
A shed roof, also called a mono-pitch roof, has only one slope. This is a favourite in modern homes because it creates a sharp, bold profile.
These roofs add drama, direct water flow, and support clerestory windows. Revit makes them easy to shape with a single sloping plane.
Butterfly roof concepts
A butterfly roof has two slopes that angle downward toward the centre. It creates a striking look and can collect rainwater in a controlled way.
This roof style is more advanced, but Revit can model it by combining slopes and reference planes. It is a strong choice for bold modern homes.
Mansard and mixed roof forms
A mansard roof has two slopes on each side, often with a steeper lower section. While it is less common in minimal modern homes, it can still be adapted into mixed contemporary designs.
Mixed roof forms combine different roof types in one building. Revit is especially useful here because it allows you to blend roof parts while still managing levels and intersections.
Multi-level and combination roofs
Many modern homes don’t use a single roof shape. They use several connected volumes, each with its own roof form.
For example, a house may have a flat main roof, a shed roof over a studio wing, and a small gable roof over an entry area. Revit helps you keep these forms organised and aligned.
Choosing a roof style based on the home’s architecture
The roof should fit the house, not fight against it. A minimalist home often works better with flat or shed roofs. A balanced family home may suit a gable or hip roof. A sculptural house may need a butterfly or mixed roof form.
Roof type comparison table
Roof TypeVisual CharacterPractical UseRevit Modeling Approach
Flat Roof Clean, simple, modern Terraces, solar panels, minimal design Roof by footprint with slight slope
Gable Roof Classic but adaptable Good drainage, simple structure Footprint with two sloping sides
Hip Roof Balanced and stable Weather resistance, compact form Footprint with sloped edges
Shed Roof Bold and directional Clerestory windows, modern style Single slope using footprint or extrusion
Butterfly Roof Dramatic and sculptural Rain collection, standout design Combined slopes and reference planes
Mansard Roof Layered and refined Mixed-style homes More advanced footprint modelling
Mixed Roof Flexible and customised Multi-volume modern homes Combine multiple roof objects
Revit Architecture Roof Design Ideas for Modern Homes
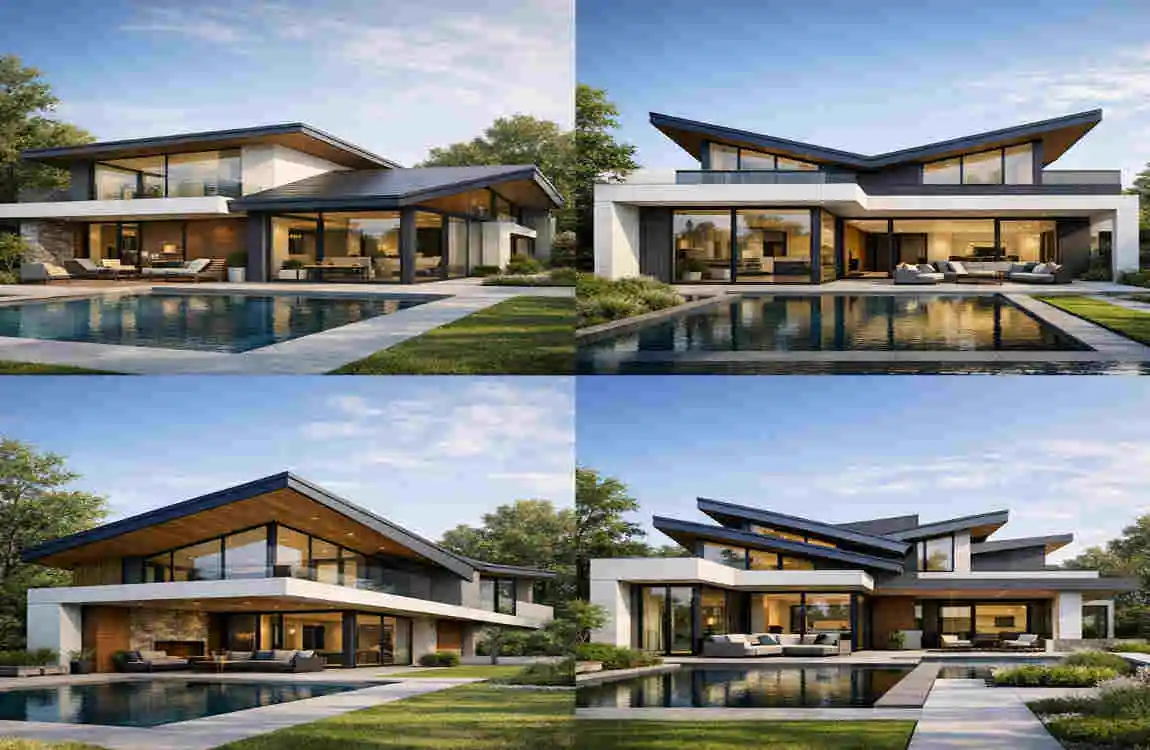
Now let’s look at practical roof ideas you can use in modern residential design.
Minimalist flat roof concepts
A minimalist flat roof gives the home a calm and refined appearance. It works especially well when the walls, windows, and roof edge all follow simple straight lines.
In Revit, this roof type helps you focus on proportions. Small changes in edge thickness, parapet height, or overhang can make a big difference.
Contemporary gable roof designs
A modern gable roof doesn’t have to feel old-fashioned. Keep the lines clean, reduce decoration, and use modern materials to keep the design fresh and elegant.
This roof type works well for homes that want a familiar shape with a contemporary twist. In Revit, you can make the ridge line precise and control the slope carefully.
Asymmetrical roof forms
Asymmetry can make a home feel more dynamic and unique. Instead of keeping both sides equal, you can shift the slope, change the ridge position, or combine different roof heights.
You can do this in Revit by adjusting reference planes and roof boundaries. It is a good way to create a roof that feels more expressive.
Large roof overhangs
Large overhangs are both beautiful and useful. They protect windows, shade interiors, and give the home a strong horizontal line.
In modern homes, overhangs often make the design feel grounded and intentional. In Revit, check overhang dimensions carefully because they affect both appearance and structure.
Roofs with skylights and clerestory windows
Skylights bring daylight into interior spaces and make the roof more active. Clerestory windows, placed high on walls near the roofline, also improve natural light and airflow.
Revit helps you place these openings clearly and see how they affect the roof composition. This is especially useful in open-plan modern homes.
Modern roof terraces
Flat roofs can become usable outdoor spaces. A roof terrace adds value by turning roof area into a social or relaxing zone.
In Revit, a roof terrace needs careful attention to waterproofing, railing placement, access, and drainage. Even if the model is simple, you must plan the details well.
Mixed-material roof concepts
Modern homes often look richer when they use more than one material. For example, a house may combine metal roof panels with a concrete edge or wood soffit.
Revit lets you assign materials to roof layers and show them in renderings. This helps you explore how the roof supports the full design story.
Cantilevered roof ideas
Cantilevered roofs extend beyond supports and create a floating effect. This adds drama and helps define entrances, patios, and outdoor zones.
These roofs require careful structural planning, but Revit can still help you visualise the form and align it with the rest of the house.
Indoor-outdoor living with extended roof planes
Many modern homes blur the line between inside and outside. A roof can support this by extending over patios, decks, and outdoor kitchens.
This creates a smooth transition between living spaces and outdoor areas. In Revit, check these long roof planes against openings, columns, and shade zones.
Using roof geometry to create architectural focal points
A roof can become the home’s main feature. A bold angle, a strong ridge, or a dramatic cut in the roof line can guide the eye and define the house.
Revit is useful here because it lets you study the roof from many angles. You can test how the roof reads in elevation, section, and perspective.
Materials, Details, and Performance in Revit Roof Models
A roof is not only about shape. It also needs the right materials and construction layers to perform well.
Metal roofing for contemporary homes
Metal roofing is a popular choice for modern houses because it looks sharp and clean. It also works well with flat, shed, and gable roofs.
In Revit, metal surfaces can be represented with realistic finishes and reflections. This helps the model feel more believable in renderings.
Concrete and tile roof concepts
Concrete and tile roofs give a home a heavier and more solid appearance. They may suit certain modern homes, especially when the design blends natural texture with simple form.
These roof types often need more visible thickness, which Revit can show through roof assemblies and section views.
Shingles and other residential roofing materials
Shingles remain common in residential design because they are practical and familiar. They can still work in modern homes when paired with clean forms and simple edges.
Revit materials can help show shingle patterns and colour tones without making the roof look overly detailed.
Insulation layers and roof assemblies
A roof is made up of layers, not just a surface. Insulation, structure, waterproofing, and finish all matter.
In Revit, roof assemblies let you represent these layers in a way that supports documentation and coordination. This is important for energy performance and construction accuracy.
Roof thickness and construction layers
Roof thickness affects how the house looks in section and how it meets the walls. A thin roof may feel light and modern, while a thicker roof may feel more solid and protective.
Check these decisions in Revit, so the final model matches the design intent.
Gutters, fascia, soffits, and flashing
Small details matter a lot. Gutters manage water, fascia creates a clean edge, soffits close the underside of the overhang, and flashing protects vulnerable joints.
These parts may seem minor, but they improve both performance and realism. Revit documentation becomes stronger when you consider these elements early.
Solar panels and sustainable roof planning
Modern homes often include solar panels. The roof shape should support their placement and angle.
Revit can help you see where panels will fit best and whether shading or slope might affect performance. This makes sustainability part of the early design process, not an afterthought.
Roof drainage considerations
Every roof needs a water strategy. Flat roofs need proper slope to drains. Sloped roofs need controlled runoff. Overhangs and gutters must guide water safely away from the building.
This is one of the most important parts of Revit architecture roof design because a beautiful roof still has to work in real weather conditions.
How material choices affect appearance and performance
Materials affect more than style. They influence heat gain, weight, maintenance, and durability.
A metal roof may reflect more sunlight. A dark shingle roof may absorb more heat. A thick layered roof may offer better insulation. Revit helps you compare these choices visually and technically.
Rendering realistic roof materials in Revit
Realistic rendering makes a roof easier to understand. When you apply proper textures, colours, and reflectivity, the project feels closer to a real building.
This is useful when presenting to clients, because they can see how the roof fits the overall home design.
Revit Workflow: From Roof Concept to Detailed Residential Model
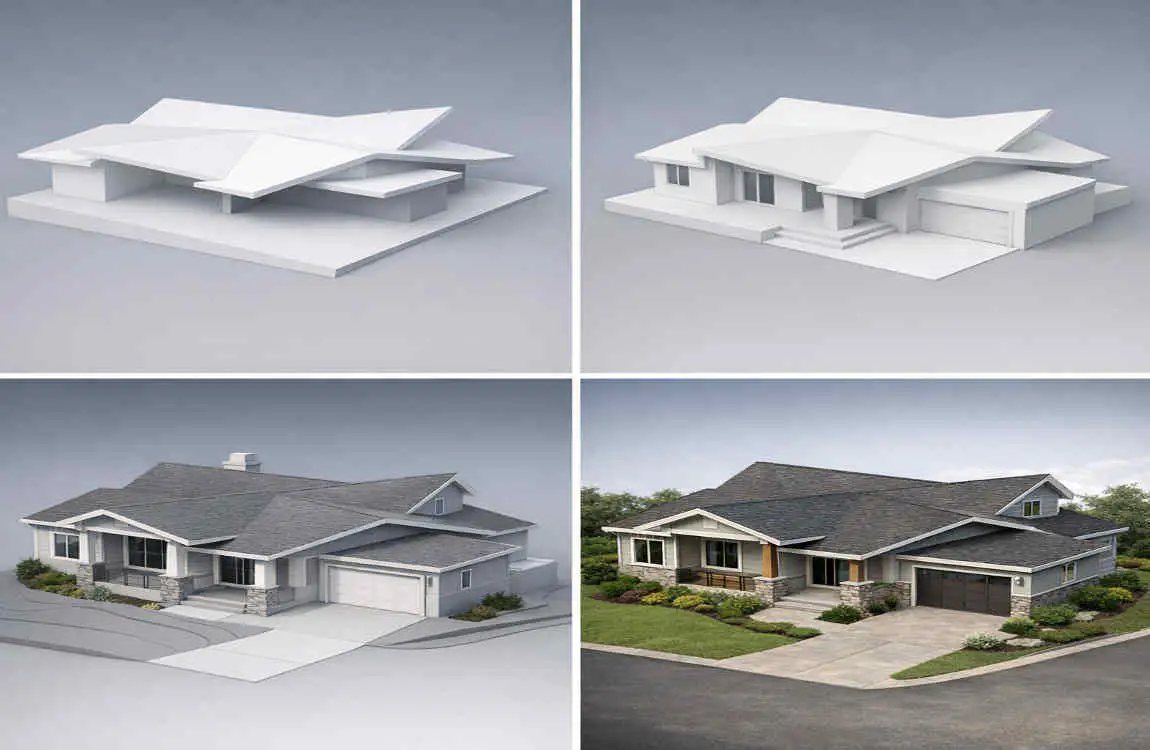
A clear workflow helps you avoid confusion and rework. Here is a simple way to build a roof model in Revit.
Start with the architectural floor plan.
Begin with the home’s plan. The roof should grow from the building footprint, wall layout, and room arrangement.
This ensures the roof matches the house shape from the start.
Establish roof levels and reference geometry.
Set the roof level first. Then add reference planes to control edges, ridges, and offsets.
This step is especially helpful when the home has multiple volumes or uneven heights.
Select the appropriate roof creation method.
Choose the roof tool that best fits your project. Use footprint for simple roofs, extrusion for directional forms, and mixed tools for advanced designs.
The right method saves time and gives you more control.
Define slopes and roof boundaries.
Mark which edges slope and which stay vertical. This is where you define drainage and roof character.
If you are working on a modern home, even a small change in slope can make a big visual difference.
Adjust roof joins and overhangs.
Check how roof parts meet. Make sure corners, ridges, and valleys look clean. Then set overhangs to match the design intent.
This is one place where careful editing really improves the final result.
Add openings, skylights, and roof features.
Now place skylights, roof hatches, vents, and other openings. These features should be planned, not added randomly.
They affect both the appearance and the real performance of the roof.
Create roof assemblies and material layers.
Build the roof as a real assembly with structure, insulation, and finish layers. This helps with drawings, schedules, and sections.
It also makes the model more useful for collaboration.
Check dimensions and intersections.
Always check for mistakes. Make sure the roof does not clash with walls, ceilings, or structural elements.
A clean roof model should be accurate in every view, not just in 3D.
Generate 3D views and architectural elevations.
Use 3D views to review the roof from all sides. Elevations help you judge proportions, while sections show thickness and layering.
These views are essential for spotting problems early.
Use sections to review construction details.
Sections are especially important when the roof has overhangs, parapets, or level changes. They help confirm that the design is buildable.
This is where design meets construction.
Prepare the roof model for documentation and presentation.
Once the roof is complete, make sure it is ready for sheets, notes, and final presentation views.
A clear roof model helps the whole project feel more professional and easier to understand.
FAQ: Revit Architecture Roof Design
What is Revit Architecture roof design?
It is the process of creating roof forms inside Revit using smart, editable building elements that connect with the rest of the architectural model.
How do you create a roof in Revit Architecture?
You usually create a roof by using the Roof by Footprint tool, tracing the roof boundary, and setting slope lines where needed.
What is the easiest roof type to model in Revit?
A flat roof or a simple gable roof is usually the easiest because both can be built with basic footprint tools.
Can Revit create complex modern roof designs?
Yes. Revit can handle complex roof forms, especially when you use reference planes, multiple roof objects, and careful level control.
How do you change the slope of a roof in Revit?
You change the slope by editing the roof boundary and slope settings, or by adjusting slope arrows and reference geometry.
Can you model a flat roof in Revit?
Yes. Flat roofs are common in Revit and in modern architecture. They usually include a slight slope for drainage.
How do you add roof materials in Revit?
You assign materials through the roof type properties and assembly layers, then update the model’s visual appearance.
| Roof Design Idea | Key Features | Best For |
|---|---|---|
| Flat Roof | Clean lines, simple geometry, rooftop space | Modern minimalist homes |
| Gable Roof | Sloped sides, classic structure, easy modeling | Contemporary family homes |
| Hip Roof | Slopes on all sides, balanced appearance | Windy or high-rain areas |
| Shed Roof | Single slope, modern and simple | Small modern homes |
| Butterfly Roof | V-shaped design, dramatic appearance | Eco-friendly modern homes |
| Green Roof | Vegetation, insulation, sustainable design | Sustainable homes |
| Roof Terrace | Usable outdoor area, flat roof layout | Urban homes |
| Mixed Roof | Combines flat, gable, or shed forms | Custom luxury homes |
| Skylight Roof | Adds natural daylight indoors | Bright modern interiors |
| Curved Roof | Smooth, sculptural geometry | Contemporary statement homes |